Contents — 16 parts
- What is the continental grip?
- How to find the continental grip, step by step
- The bevels of the handle: the marker that never lies
- Why the continental grip is the standard in padel
- The other grips: when should you change?
- Why avoid the tennis “western” grip
- How high should you hold the handle?
- Firm, but not too firm: grip pressure
- The wrist strap: a rule, and a way to wear it
- Handle size and overgrip: set up the grip before correcting it
- The most common mistakes
- Drills to make the continental grip stick
- Racket grip and tennis elbow
- And where does the racket come in?
- In short
- Frequently asked questions
To hold a padel racket properly, you use the continental grip, also called the “hammer grip”: frame edge pointing up, hand closed around the handle as if around a hammer, the base of the index finger on the upper diagonal bevel of the handle and the “V” formed by thumb and index finger on its top ridge. The hand sits at the bottom of the handle, firm but not clenched, and the wrist strap goes on before you even pick up the racket. This one grip covers the volley, the serve, the bandeja and the smash.
This guide explains how to find it in four steps, why it is the standard in padel, when other grips have their place and why the tennis forehand grip causes problems, then covers hand height, grip pressure, the wrist strap, handle thickness, common mistakes, drills to make it stick and the link with tennis elbow.
What is the continental grip?
The continental grip is the way of holding the racket that goes by the same name in tennis, where it is used for the serve and the volley. In padel, it has become the default grip. A Spanish study on the volley, published in 2015 by Antonio Montes Fernández and Javier Rojo Rodríguez, sums up common practice: most players hold their racket with a hammer or continental grip, and only the most experienced change it depending on the shot.
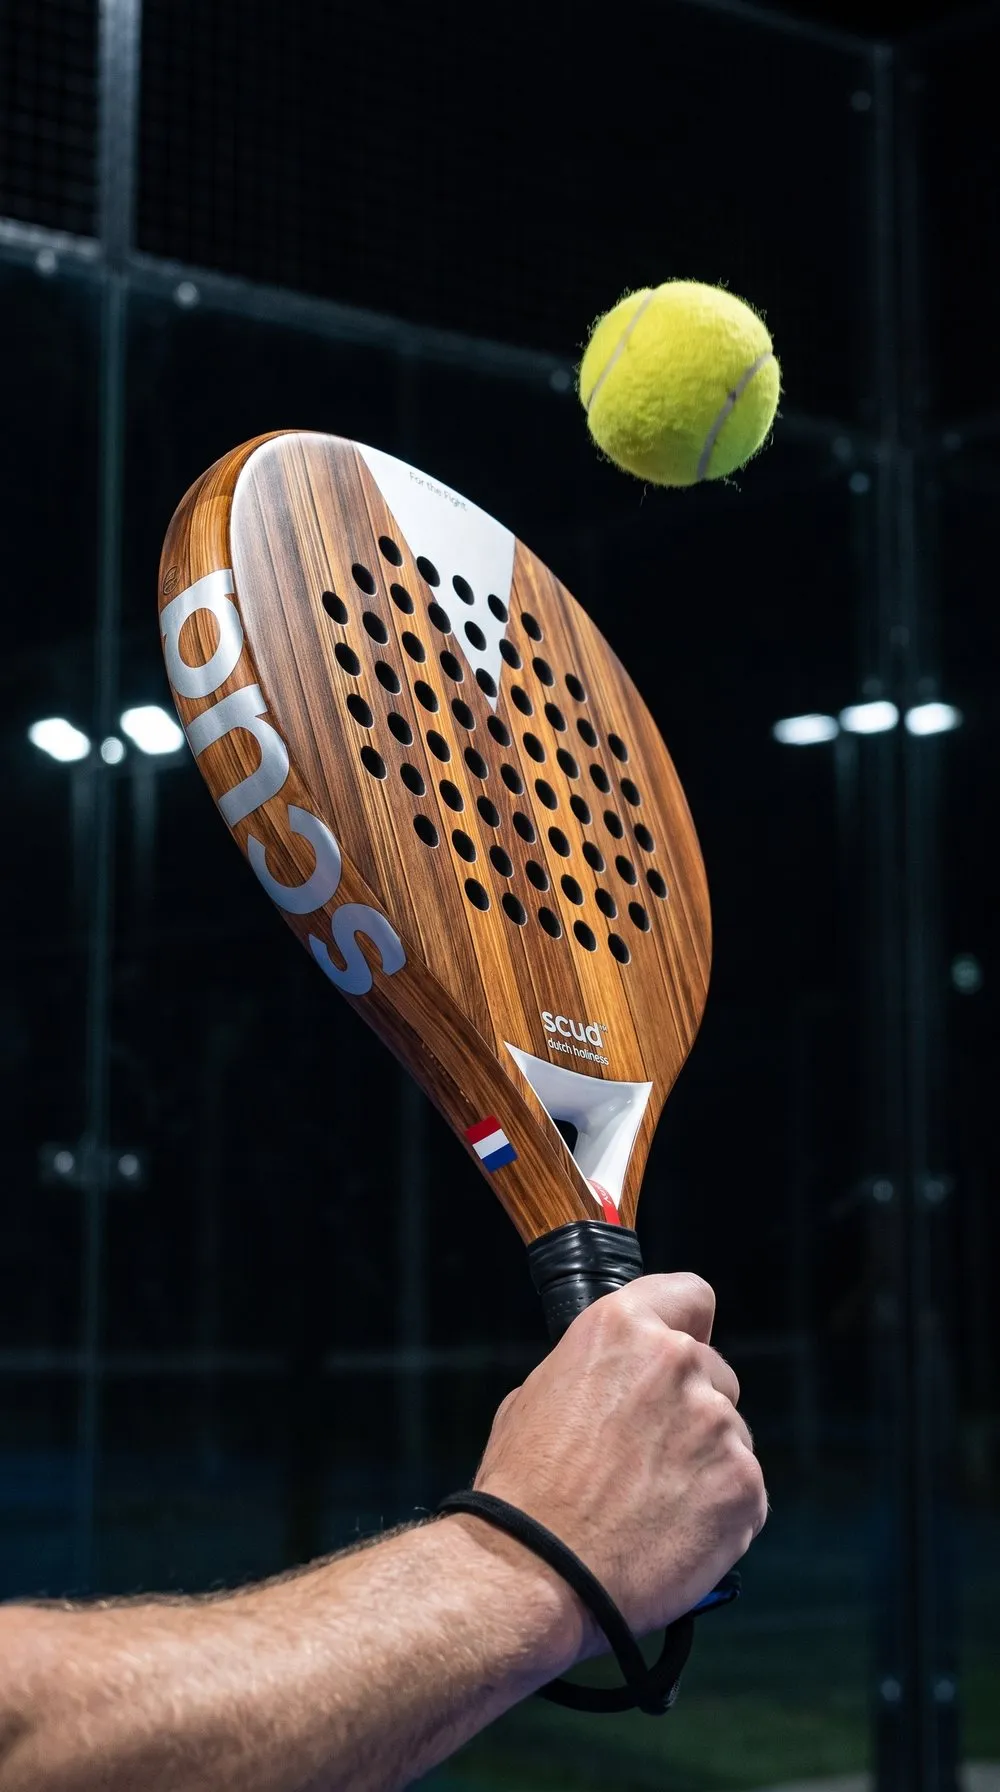
The same authors use a precise technical description: you hold the racket like a hammer you are about to drive a nail with, pressing on one of the narrow sides of the handle, the thumb on the broad front side and the other fingers on the broad back side. In other words, the edge of the frame extends the edge of your hand, and both faces of the racket remain free to turn towards the forehand or the backhand.
How to find the continental grip, step by step
The simplest method starts with the racket held in your other hand, so that your dominant hand doesn’t “choose” its usual position:
- Put the wrist strap on, then hold the racket by the throat with your free hand, frame edge pointing up, face perpendicular to the ground.
- Place your dominant hand on the handle and close it as if around a hammer; it is also the handshake image Babolat uses in its basic advice.
- Check the base of your index finger: it rests on the diagonal bevel just to the right of the top of the handle (for a right-hander). The “V” formed by thumb and index finger then sits on the top ridge, in line with the frame edge.
- Slide your hand down to the bottom of the handle, with the heel of your palm level with the butt.
A word about that famous “V”: Padel Browser places it on the top ridge of the handle, Babolat on its “left ridge” or “in line with the frame”. Three ways of saying that the edge of the racket starts from the gap between thumb and index finger. The most reliable marker is still the base of the index finger, which the diagram below numbers.
The bevels of the handle: the marker that never lies
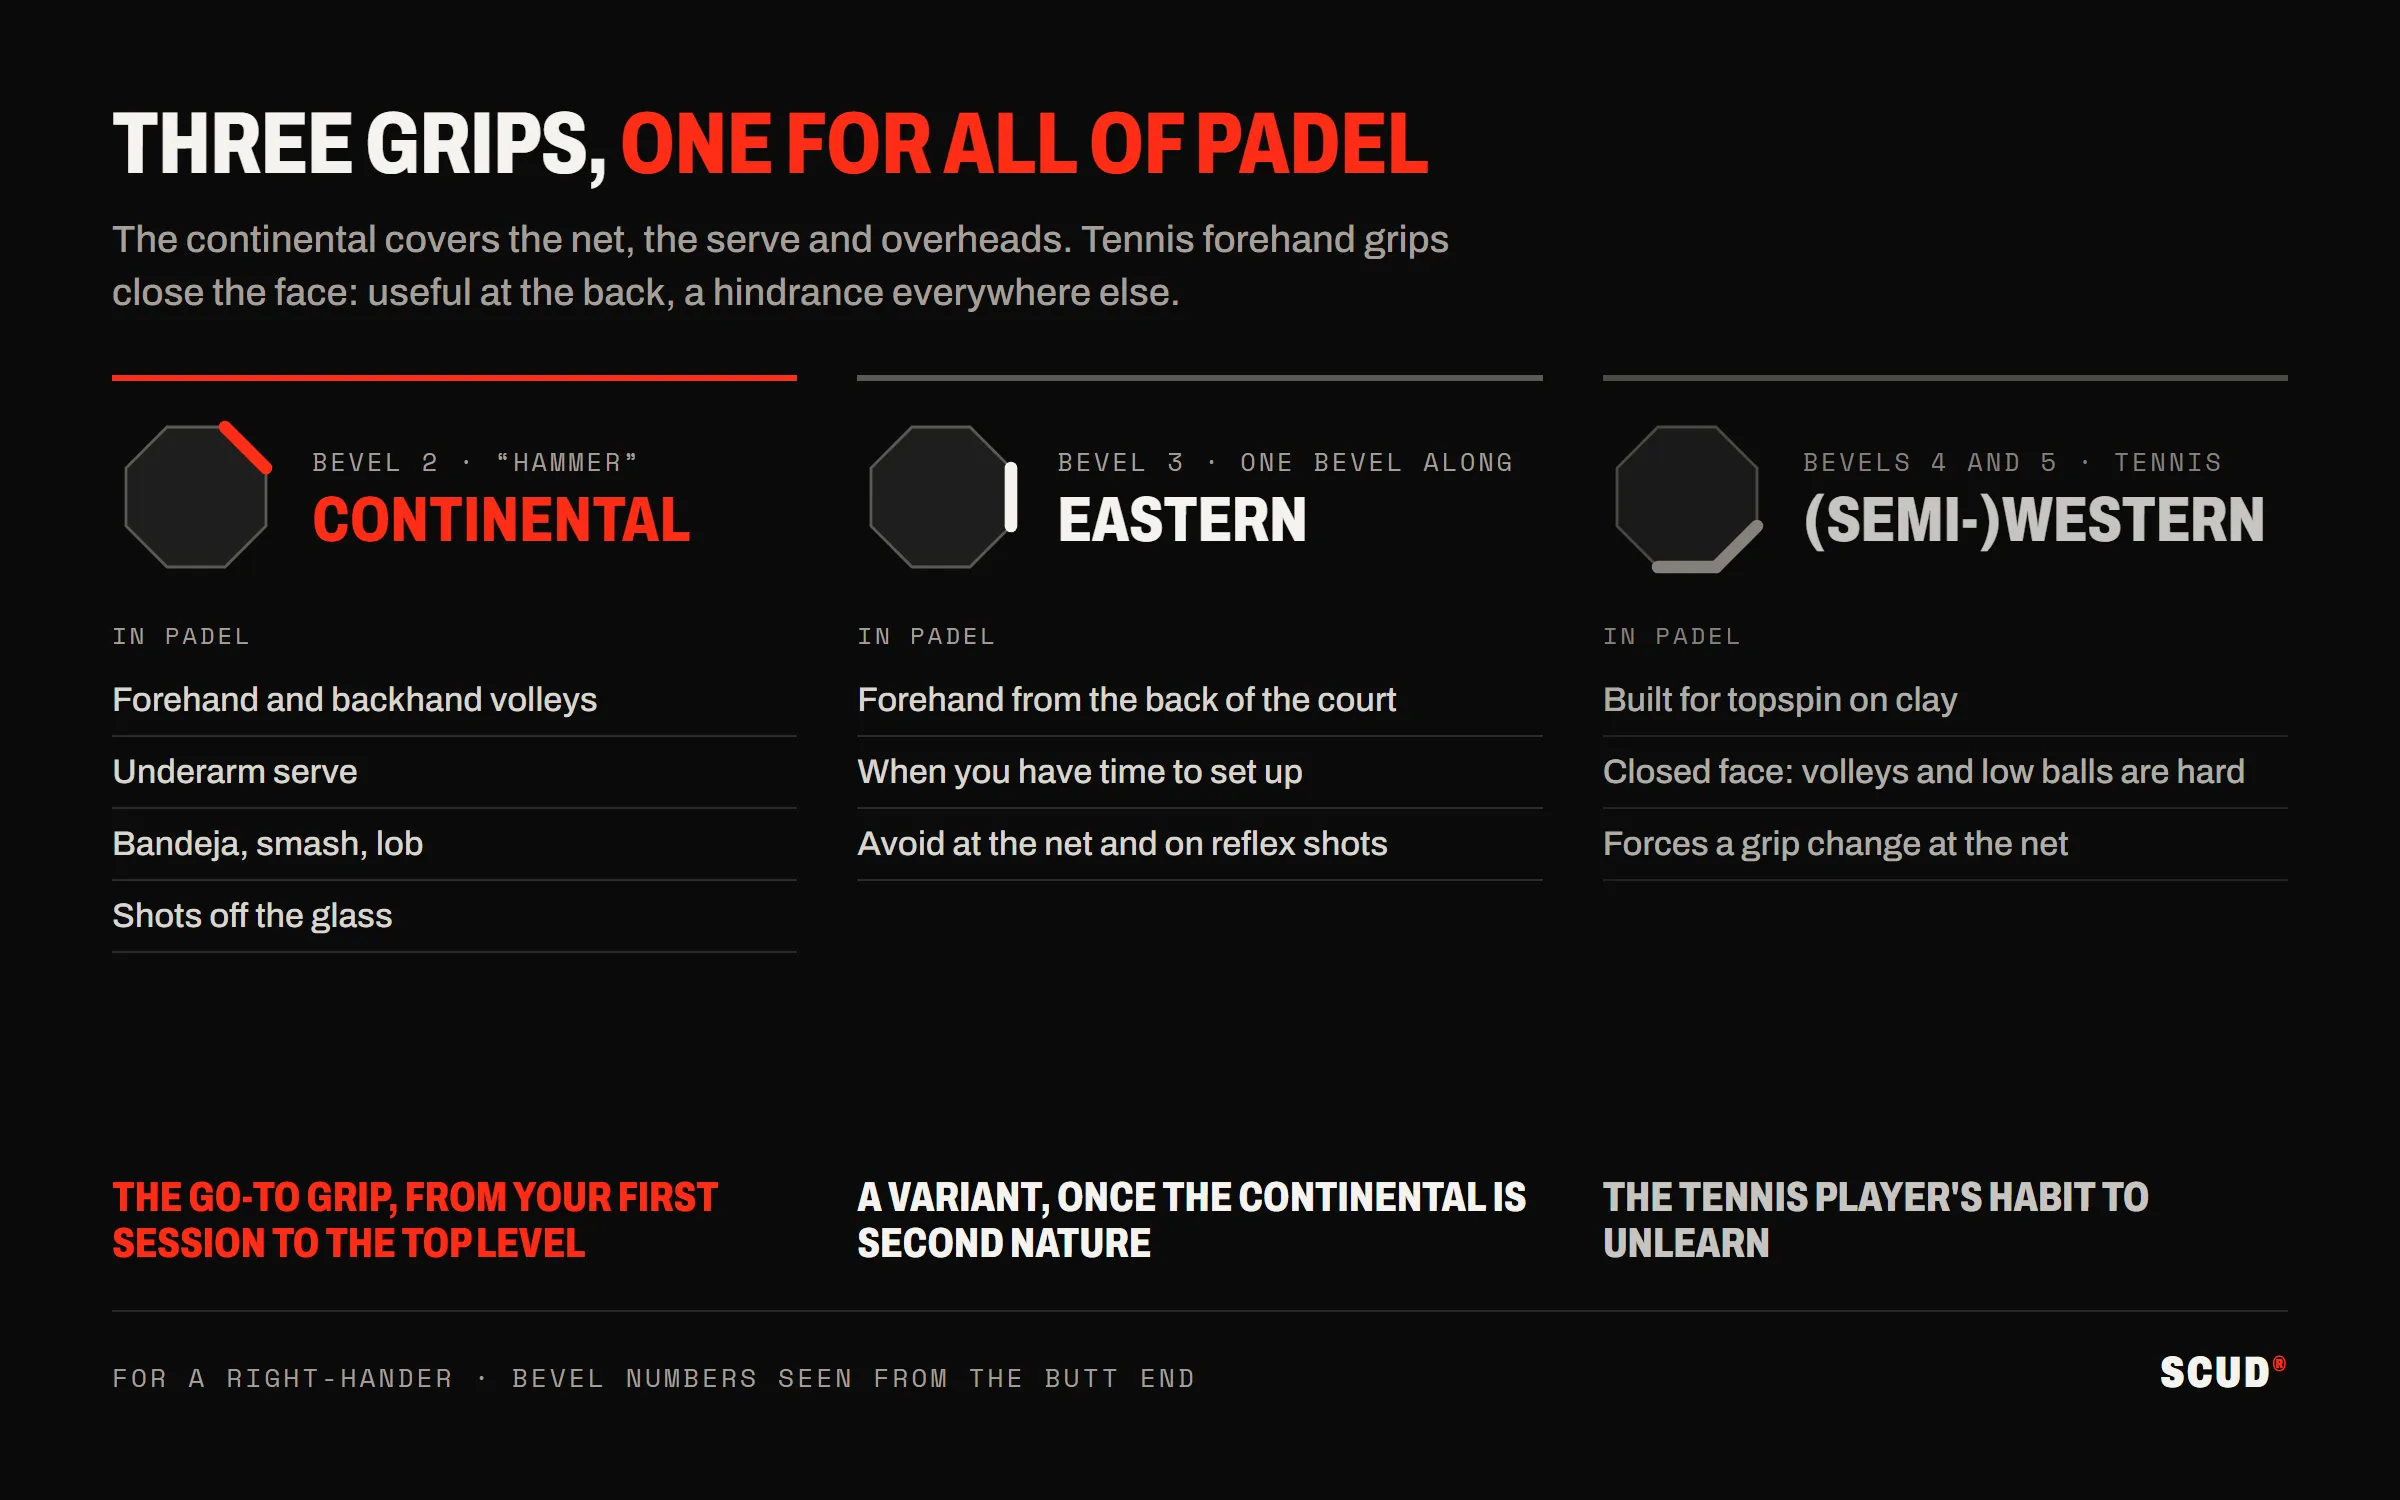
A racket handle is an octagon: eight flat sides, or bevels, which tennis numbers by convention. With the edge pointing up, the top bevel is number 1, and you count round from there: according to the most common convention, described by American coach Jon Crim on Tennis Companion, you go clockwise looking at the handle from its butt end. For a right-hander, the continental grip puts the base of the index finger on bevel 2, the eastern forehand grip on bevel 3, the semi-western on bevel 4 and the western on bevel 5. For a left-hander, everything is mirrored.
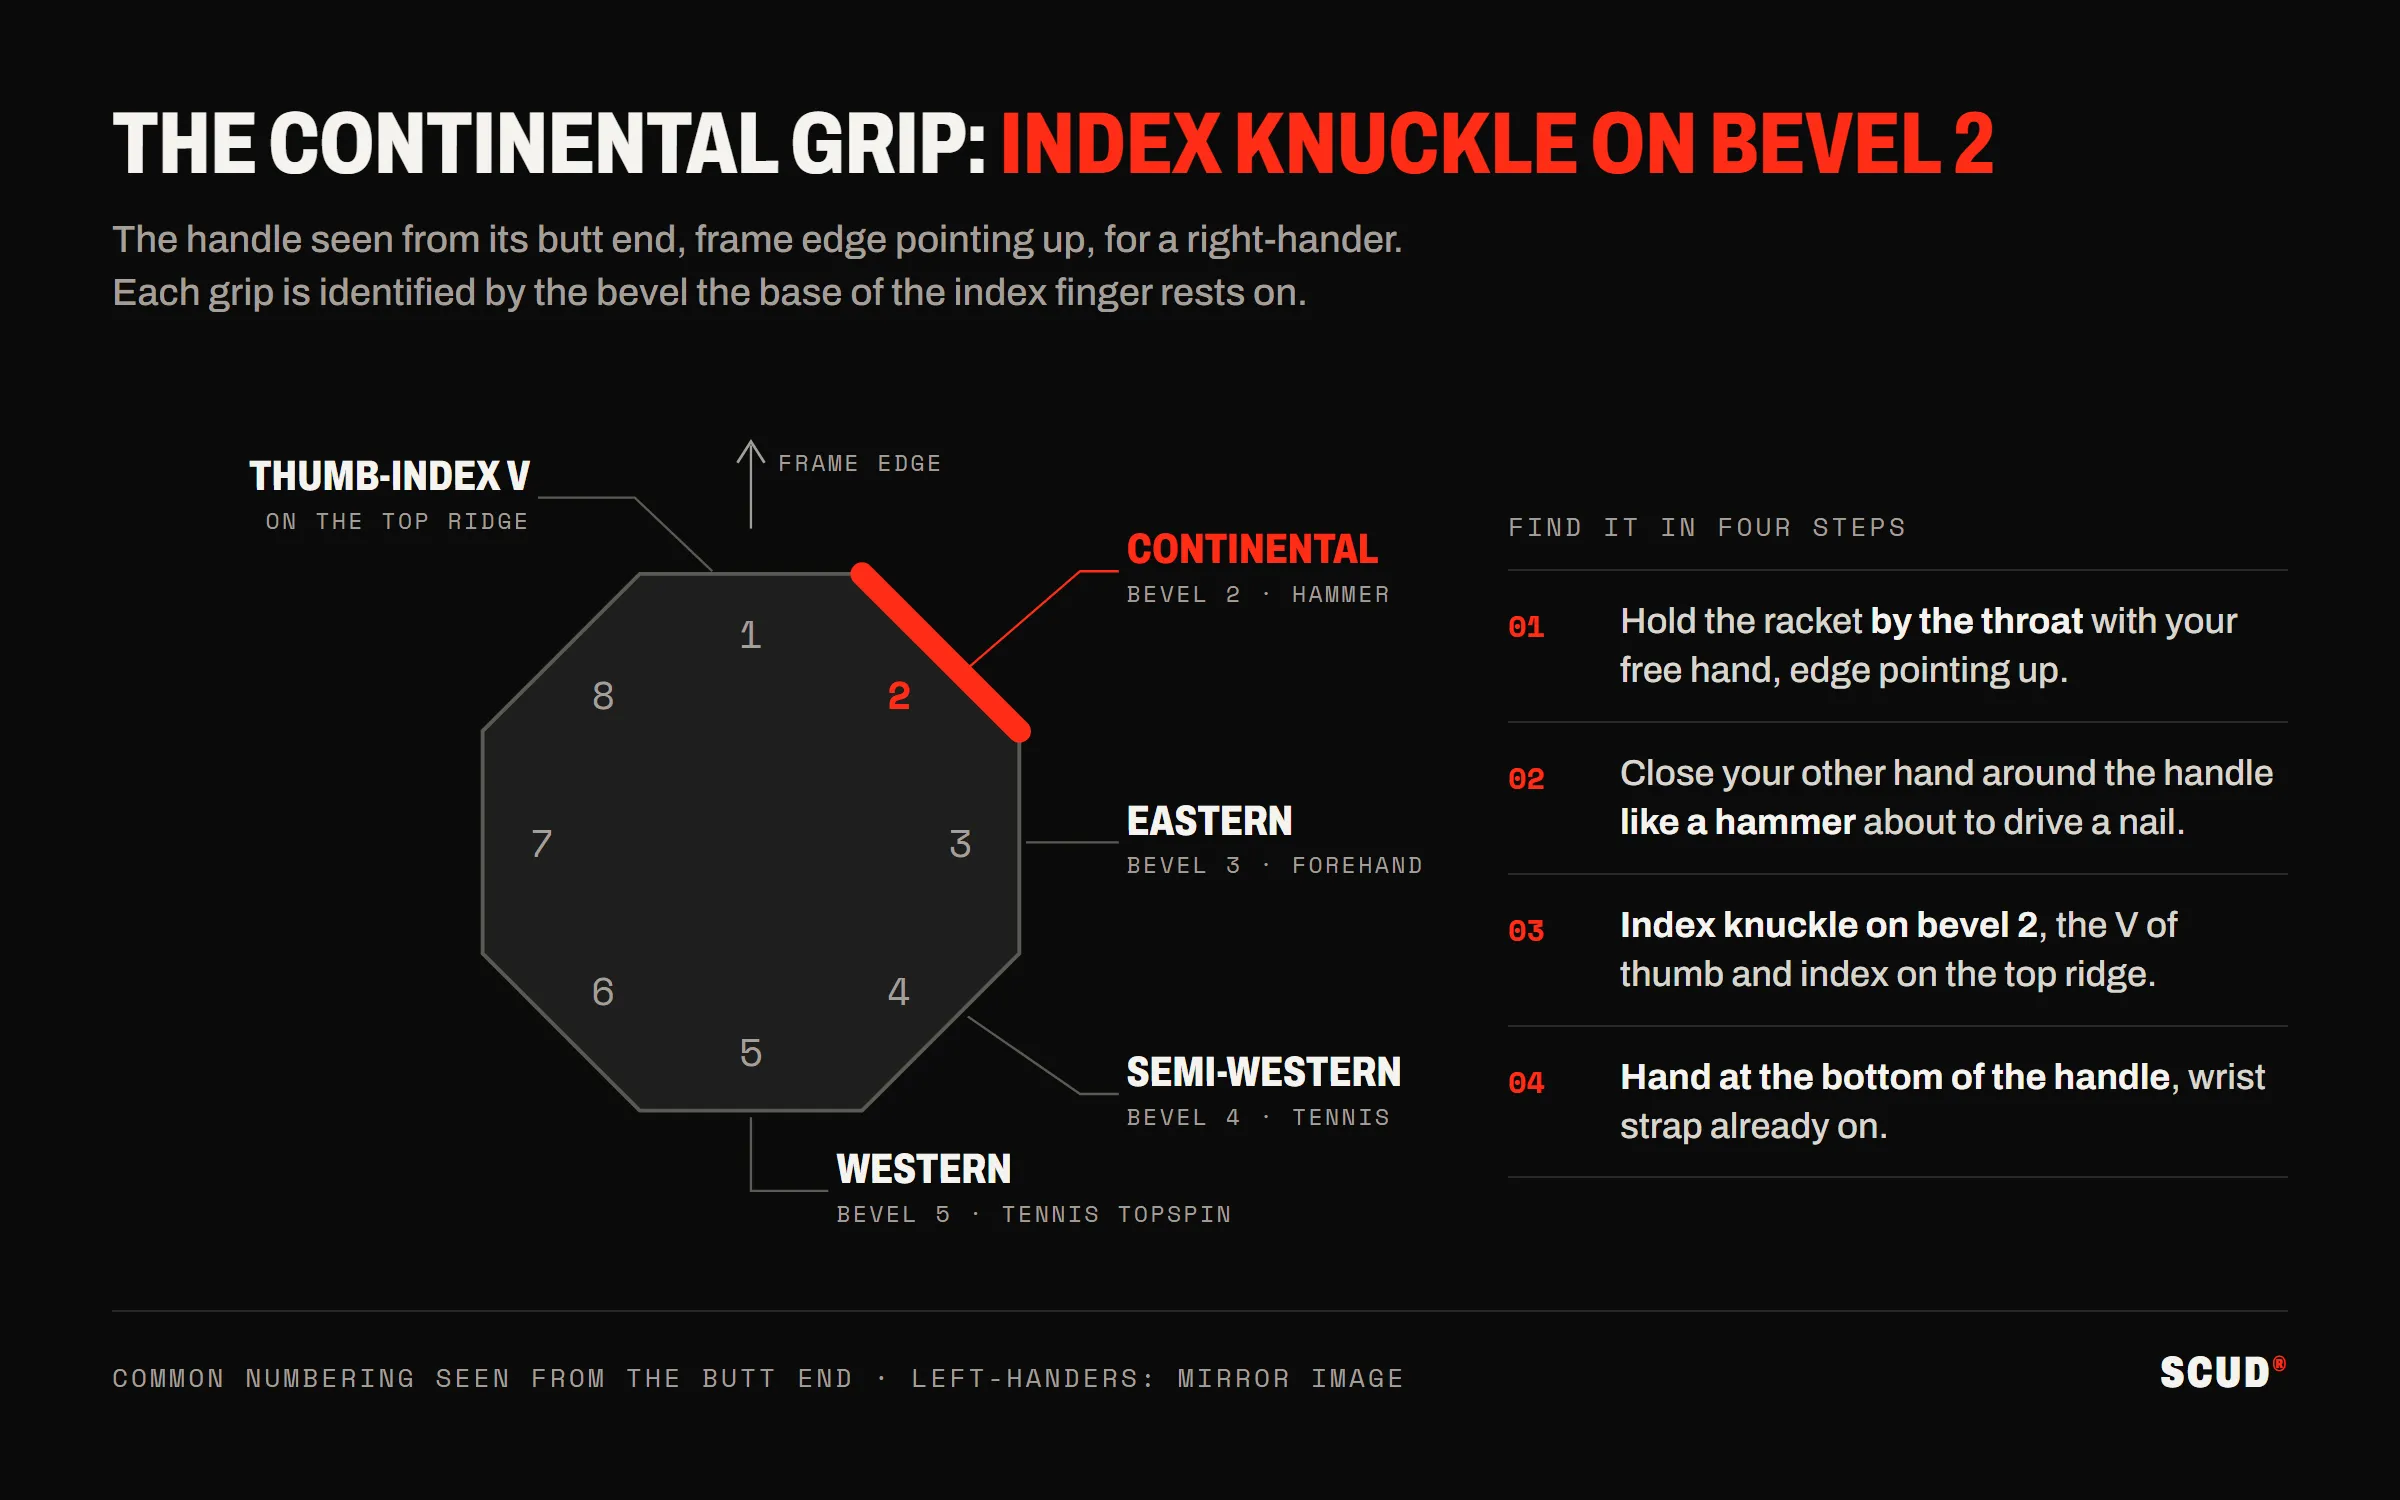
Two caveats. The numbering is not universal — Wikipedia numbers the other way round, depending on which end you look at the handle from — so just remember that bevel 2 is the diagonal between the top and the forehand face. And these markers come from tennis: on a padel racket, the bevels are often less pronounced, especially under one or two overgrips.
Why the continental grip is the standard in padel
One grip for both sides
With a continental grip, the face is almost neutral: slightly open on both forehand and backhand. Switching from one to the other only takes a rotation of the forearm, not a change of grip. Babolat uses this as its validation test: when you shadow a few strokes, the transition between forehand and backhand should feel natural.
The volley leaves no time to change
At the net, the ball comes back too quickly to turn the racket in your hand between shots. That is the central argument of our guide to the padel volley: keeping the same grip is a necessity, not a preference. And the volley is the heart of the game: the Montes Fernández and Rojo Rodríguez study cites research on elite play in which the volley is the most frequently played shot, at 24.66% of all strokes.
It works for almost every shot
The same study notes that the continental grip is particularly recommended for the sliced backhand, the forehand and backhand volley, the serve and the smash, and that it leaves the wrist the mobility needed to angle the face in fast play. Babolat adds shots played after the ball comes off the glass. Our technique guides use it for the underarm serve, the smash, the lob and the return of serve.
The other grips: when should you change?
The continental grip is not the only one, and experienced players do switch from time to time. The table below summarises what the sources we consulted describe.
| Grip | Marker (right-hander) | Uses in padel | Key point |
|---|---|---|---|
| Continental (hammer) | Base of the index finger on bevel 2 | Volleys, serve, bandeja, smash, lob, shots off the glass | The reference grip, at every level |
| Eastern forehand | Bevel 3, palm further behind the handle | Flat or topspin forehand from the back, when you have time to set up | Avoid at the net and on reflex balls |
| Eastern backhand | Bevel 1, one bevel the other way | Topspin or flat backhand, víbora according to some guides | Rare among competitive players, according to Padel Browser |
| Semi-western and western | Bevels 4 and 5 | Designed for the tennis topspin forehand | Closed face: volleys and low balls become difficult |
Padel Browser advises leaving the eastern grips alone until the continental has become automatic, and sticking to the continental for everything during your first six months. Padel Reference adds a useful nuance: the continental puts more strain on the forearm and wrist when you look for a lot of spin or block a powerful shot, which explains why some advanced players adjust it for those shots.
Why avoid the tennis “western” grip
The western grip, with the base of the index finger on bevel 5, is one of the most extreme forehand grips in tennis: it is used to load the ball with topspin, and Wikipedia notes that it is mainly used by clay-court players. The semi-western, one bevel higher, is more moderate, but it too is designed for the baseline forehand.
In padel, they cause three problems. The face is closed: for a low sliced ball or a volley, you have to break your wrist to open it again. The backhand is impossible without changing grip, and at the net there is no time. Finally, a topspin grip encourages a big baseline swing, whereas padel calls for short strokes. Padel Browser lists keeping your semi-western tennis grip among the most common mistakes; our comparison padel or tennis looks at these habits to unlearn.
How high should you hold the handle?
Lower than you think. The Padel1969 website contrasts it with tennis, where players often choke up on the grip for more control: in padel, the grip is lower, and the guides recommend holding the racket at the bottom of the handle. Jorn van t Klooster, on PadelShop.com, gives the clearest marker: the bottom of the hand, where the wrist begins, lines up with the bottom of the racket. Your fingers should not stick out past the butt, though.
Holding low gives you reach and lets the racket do the work. The same guide suggests sliding the hand down a little further for low balls, to reach them more easily. Conversely, Padel Point lists both a grip that is too high, near the throat, and one that is too low among the mistakes: in both cases the racket feels unbalanced and shots become harder.
Firm, but not too firm: grip pressure
The fingers hold, not the palm
Padel Point puts it simply: control comes mainly from the fingers, and the racket rests on the base of the index finger rather than on the whole palm. Padel Browser suggests a test: there should be a small gap left between your palm and the handle. If the handle is pressed flat into your palm, you are squeezing too hard.
A scale of 1 to 10?
There is no official scale of grip pressure. The one Padel Browser suggests is a useful guide: around 5 out of 10 during the rally, up to 7 out of 10 at impact, then relax straight away. The other guides we consulted don’t put numbers on it, but they all share the principle of a hand that is firm but relaxed, tightens at impact and relaxes between shots.
The thumb
The sources disagree on one detail. Padel Point recommends keeping the thumb on the side of the handle, not on top, to let the wrist move. PadelShop.com describes it lying flat along the handle. If in doubt, rely on the main marker: base of the index finger on bevel 2, and the thumb follows.

The wrist strap: a rule, and a way to wear it
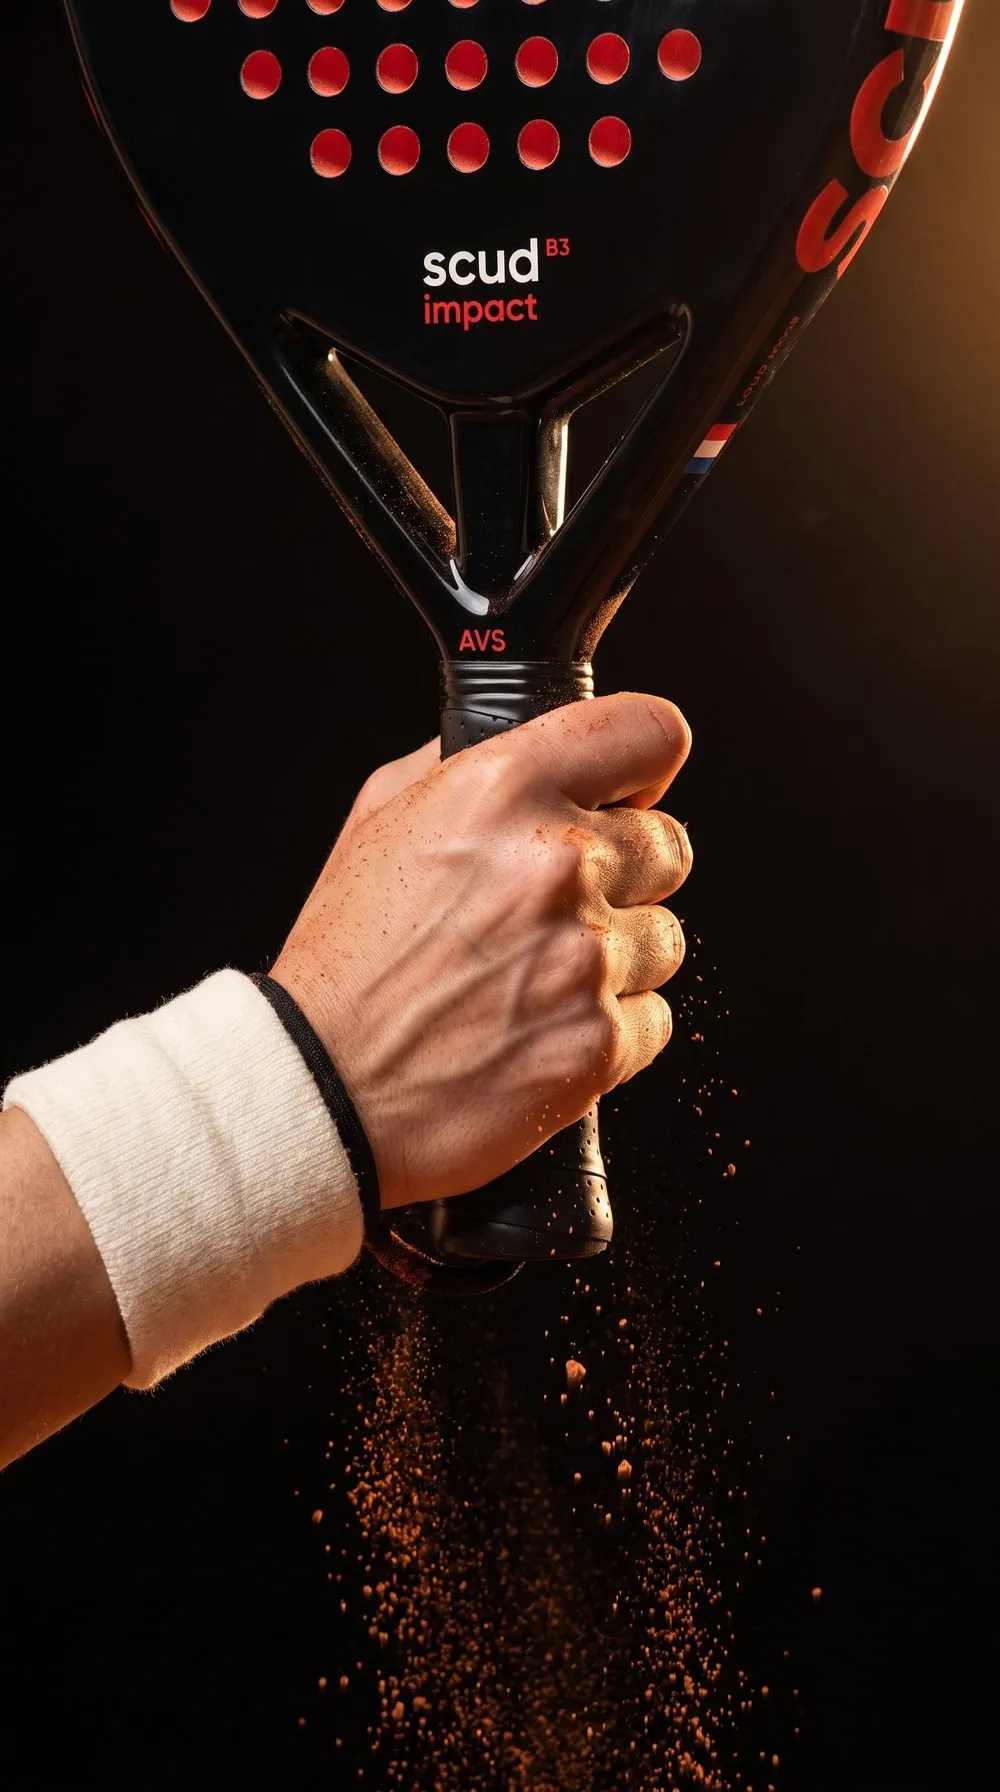
The rules of the International Padel Federation require a cord attached to the handle and worn on the wrist during play; it must be non-elastic and no longer than 35 cm. The right method, explained in our article on the safety cord, is to slip your hand through the loop, pull it up onto the wrist, and only then take hold of the handle: the cord stays in place without squeezing and lets the hand turn. Padel Browser makes the same recommendation: put the strap on before taking your grip.
Wrapped around the grip, it serves no purpose; too tight, it restricts wrist rotation on the smash.
Handle size and overgrip: set up the grip before correcting it
A good grip requires a handle of the right thickness. Padel rackets have a standard handle size, and you adjust it with overgrips: a handle that is too thin forces you to squeeze, one that is too thick locks the wrist. The most widely used test: hold the racket with a continental grip and slide the index finger of your other hand between your fingertips and the base of your palm; if it only just fits, the thickness is right. We go into this in our guide to grips, overgrips and handle size.
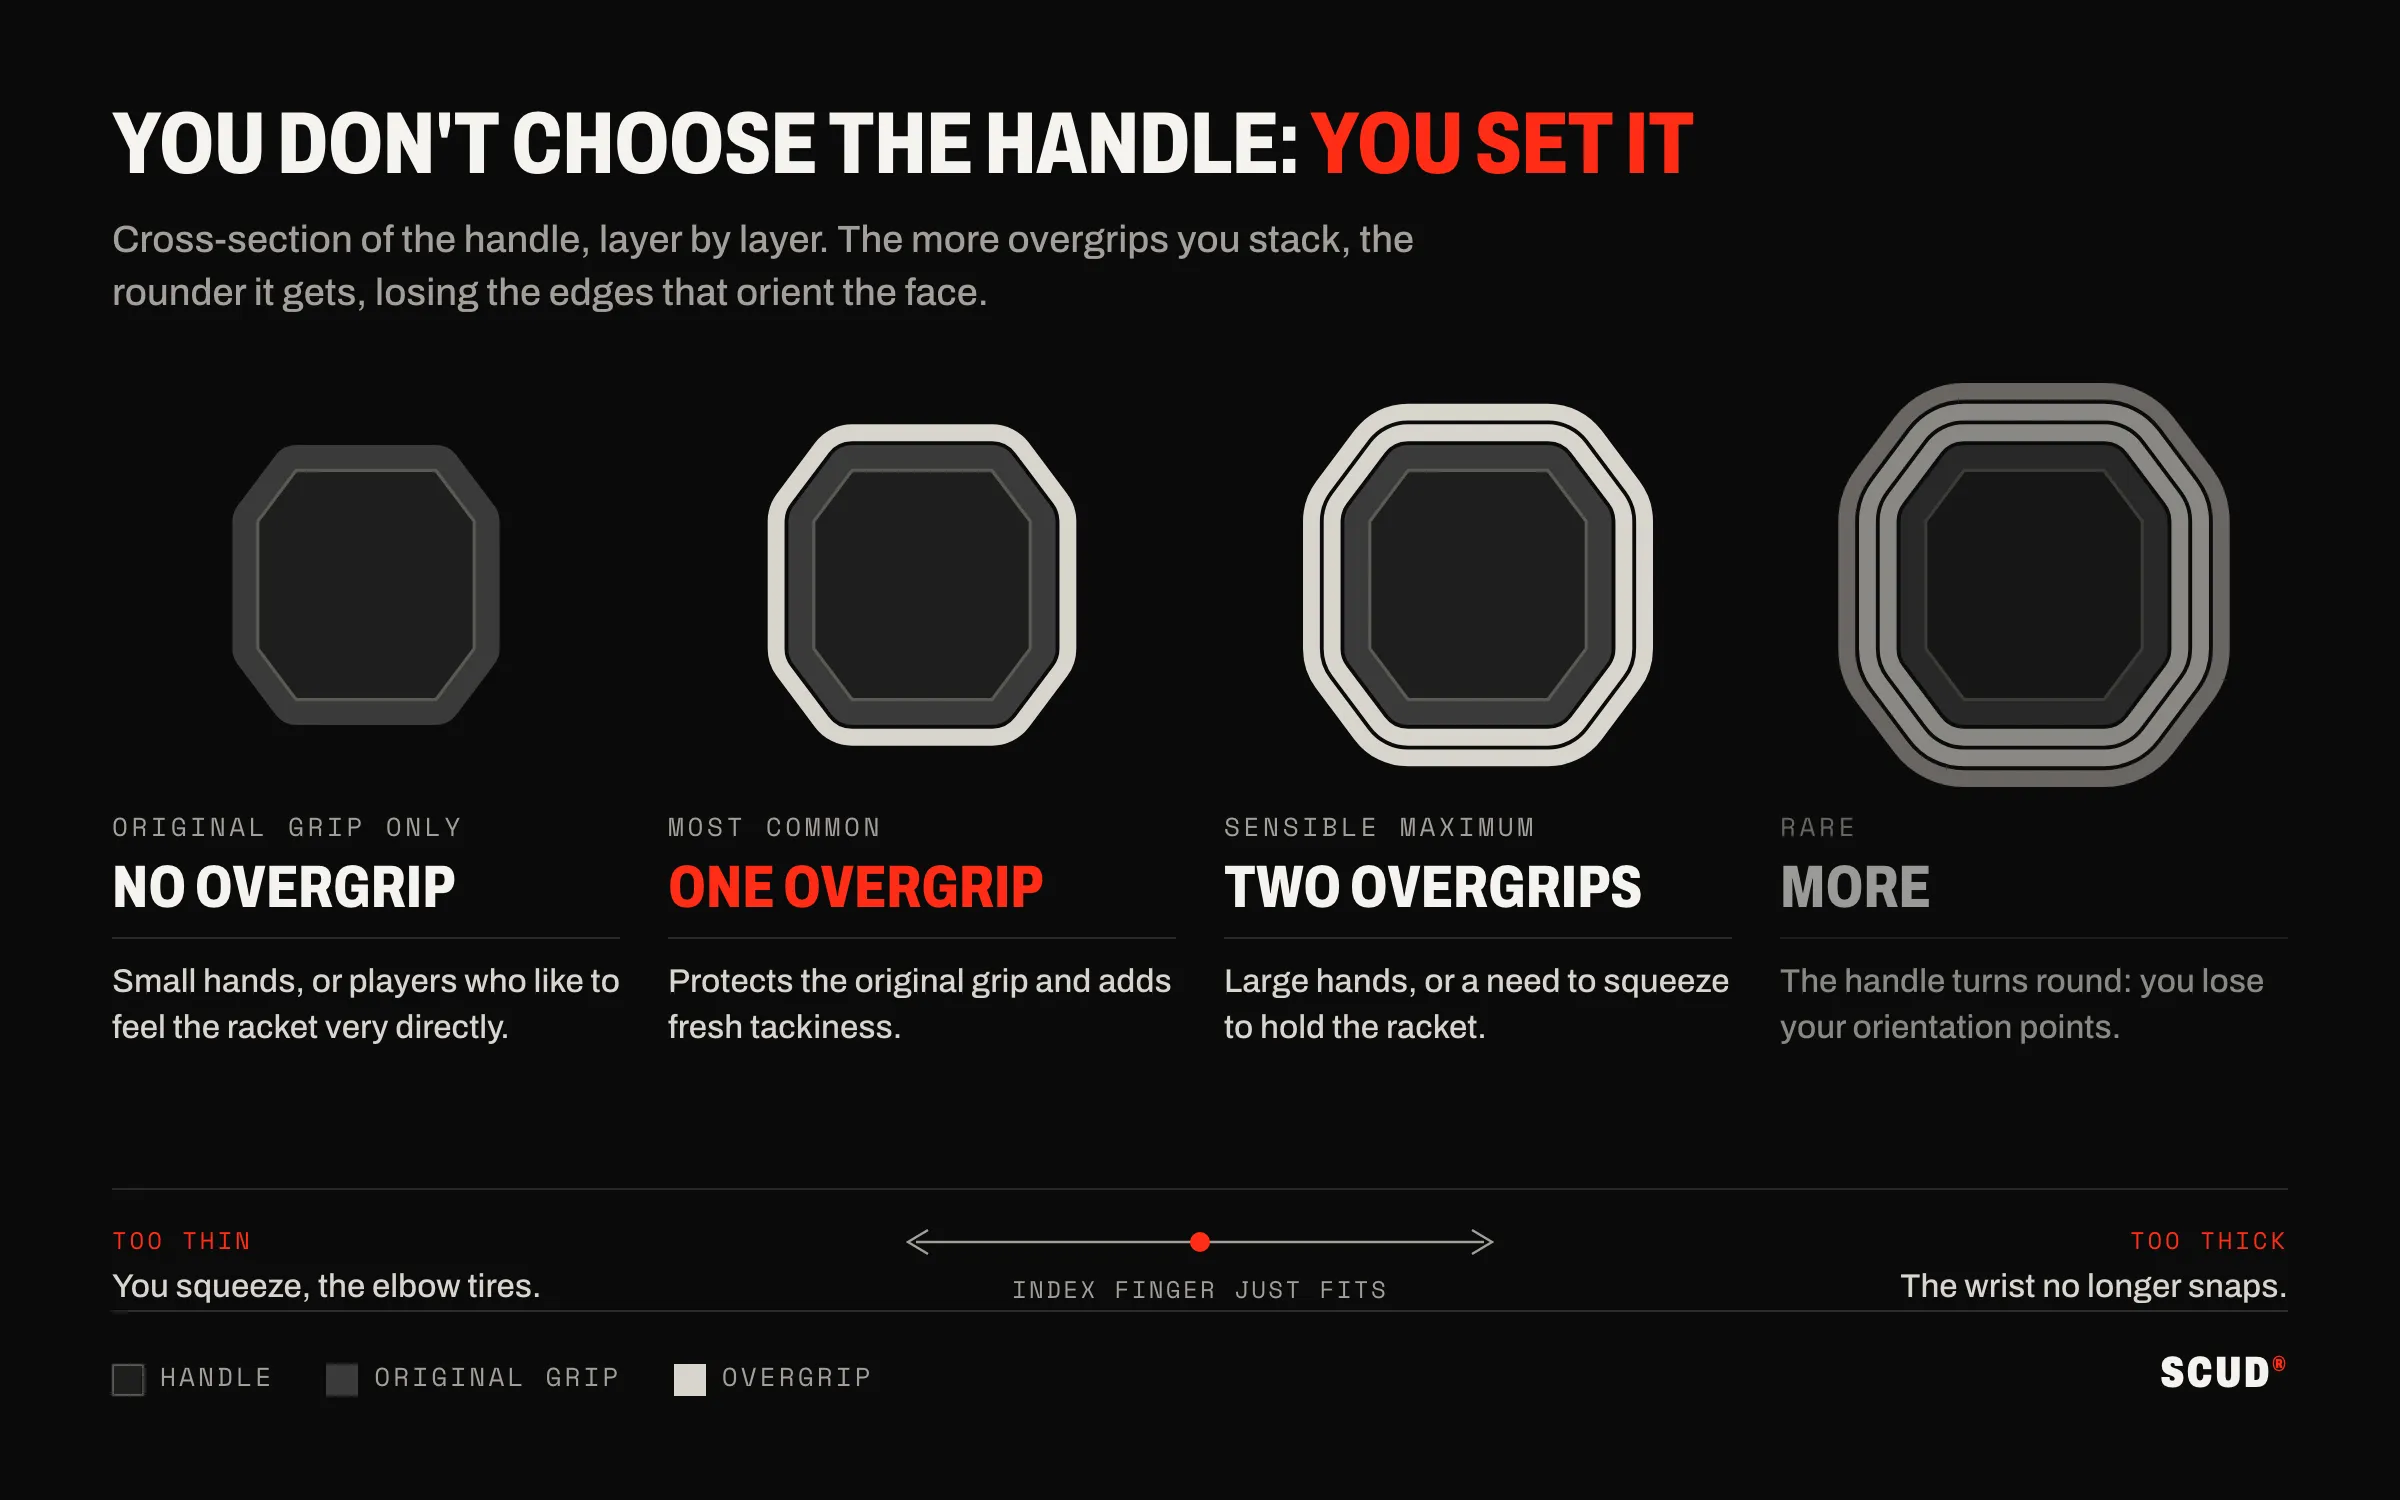
The ridges of the handle are also tactile markers: with too many overgrips, the section rounds off and you can no longer feel bevel 2 under your index finger. Finally, a worn overgrip makes you squeeze harder; Padel Browser lists squeezing harder when the racket slips, instead of adding or changing the overgrip, among the mistakes.
The most common mistakes
- Keeping the tennis forehand grip. Closed face, backhand impossible without changing grip: it is the number one mistake for players coming from tennis.
- Squeezing like a vice. The wrist locks, feel disappears and the forearm tires.
- Holding the racket in the middle of the handle. Less reach, and a racket that feels unbalanced.
- Holding with the palm rather than the fingers. A handle pressed into the hand takes away the finesse of the wrist.
- Changing grip mid-rally at the net. The ball arrives before the hand is in place.
- Moving to the eastern grips too early. Until the continental is automatic, every variant undermines it.
- Playing without a wrist strap, or with the strap wrapped around the grip. A non-compliant racket and a danger to the other three players.
Drills to make the continental grip stick
A grip settles in through repetition, slowly at first. A few simple drills, the first four taken from the guides we consulted:
- Rally against a wall for five minutes without changing grip. This is the drill Padel Browser suggests: gentle forehands and backhands, always with the continental. A steady rally with centred contact shows the grip is in place.
- Volleys against a wall from about two metres. Again from Padel Browser: alternate forehand and backhand volleys, slowly, then faster as the grip holds.
- Volleys and bandejas at reduced speed. Padel Point recommends these soft shots to internalise the grip before playing them in a match.
- Check on video or in a mirror. Film yourself or check your hand in a mirror: base of the index finger on bevel 2, hand at the bottom of the handle, thumb on the side.
- Find the grip again without looking. Between balls, let the racket turn in your hand, then find the grip again by feel, using the ridges of the handle.
These drills belong in a warm-up: five minutes of slow continental volleys prepare the hand as much as the arm.
Racket grip and tennis elbow
The way you hold the racket affects the elbow. Squeezing constantly contracts the wrist extensor muscles, which attach to the lateral epicondyle on the outside of the elbow. Padel Browser cites a tense grip among the causes of forearm fatigue and elbow injuries. A study published in 2014 in the Scandinavian Journal of Medicine & Science in Sports, carried out in tennis, measured grip forces for three handle sizes: its authors conclude that there is an optimal diameter, the one that requires the least grip force, and identify handle size as a factor in loading the extensor tendons.
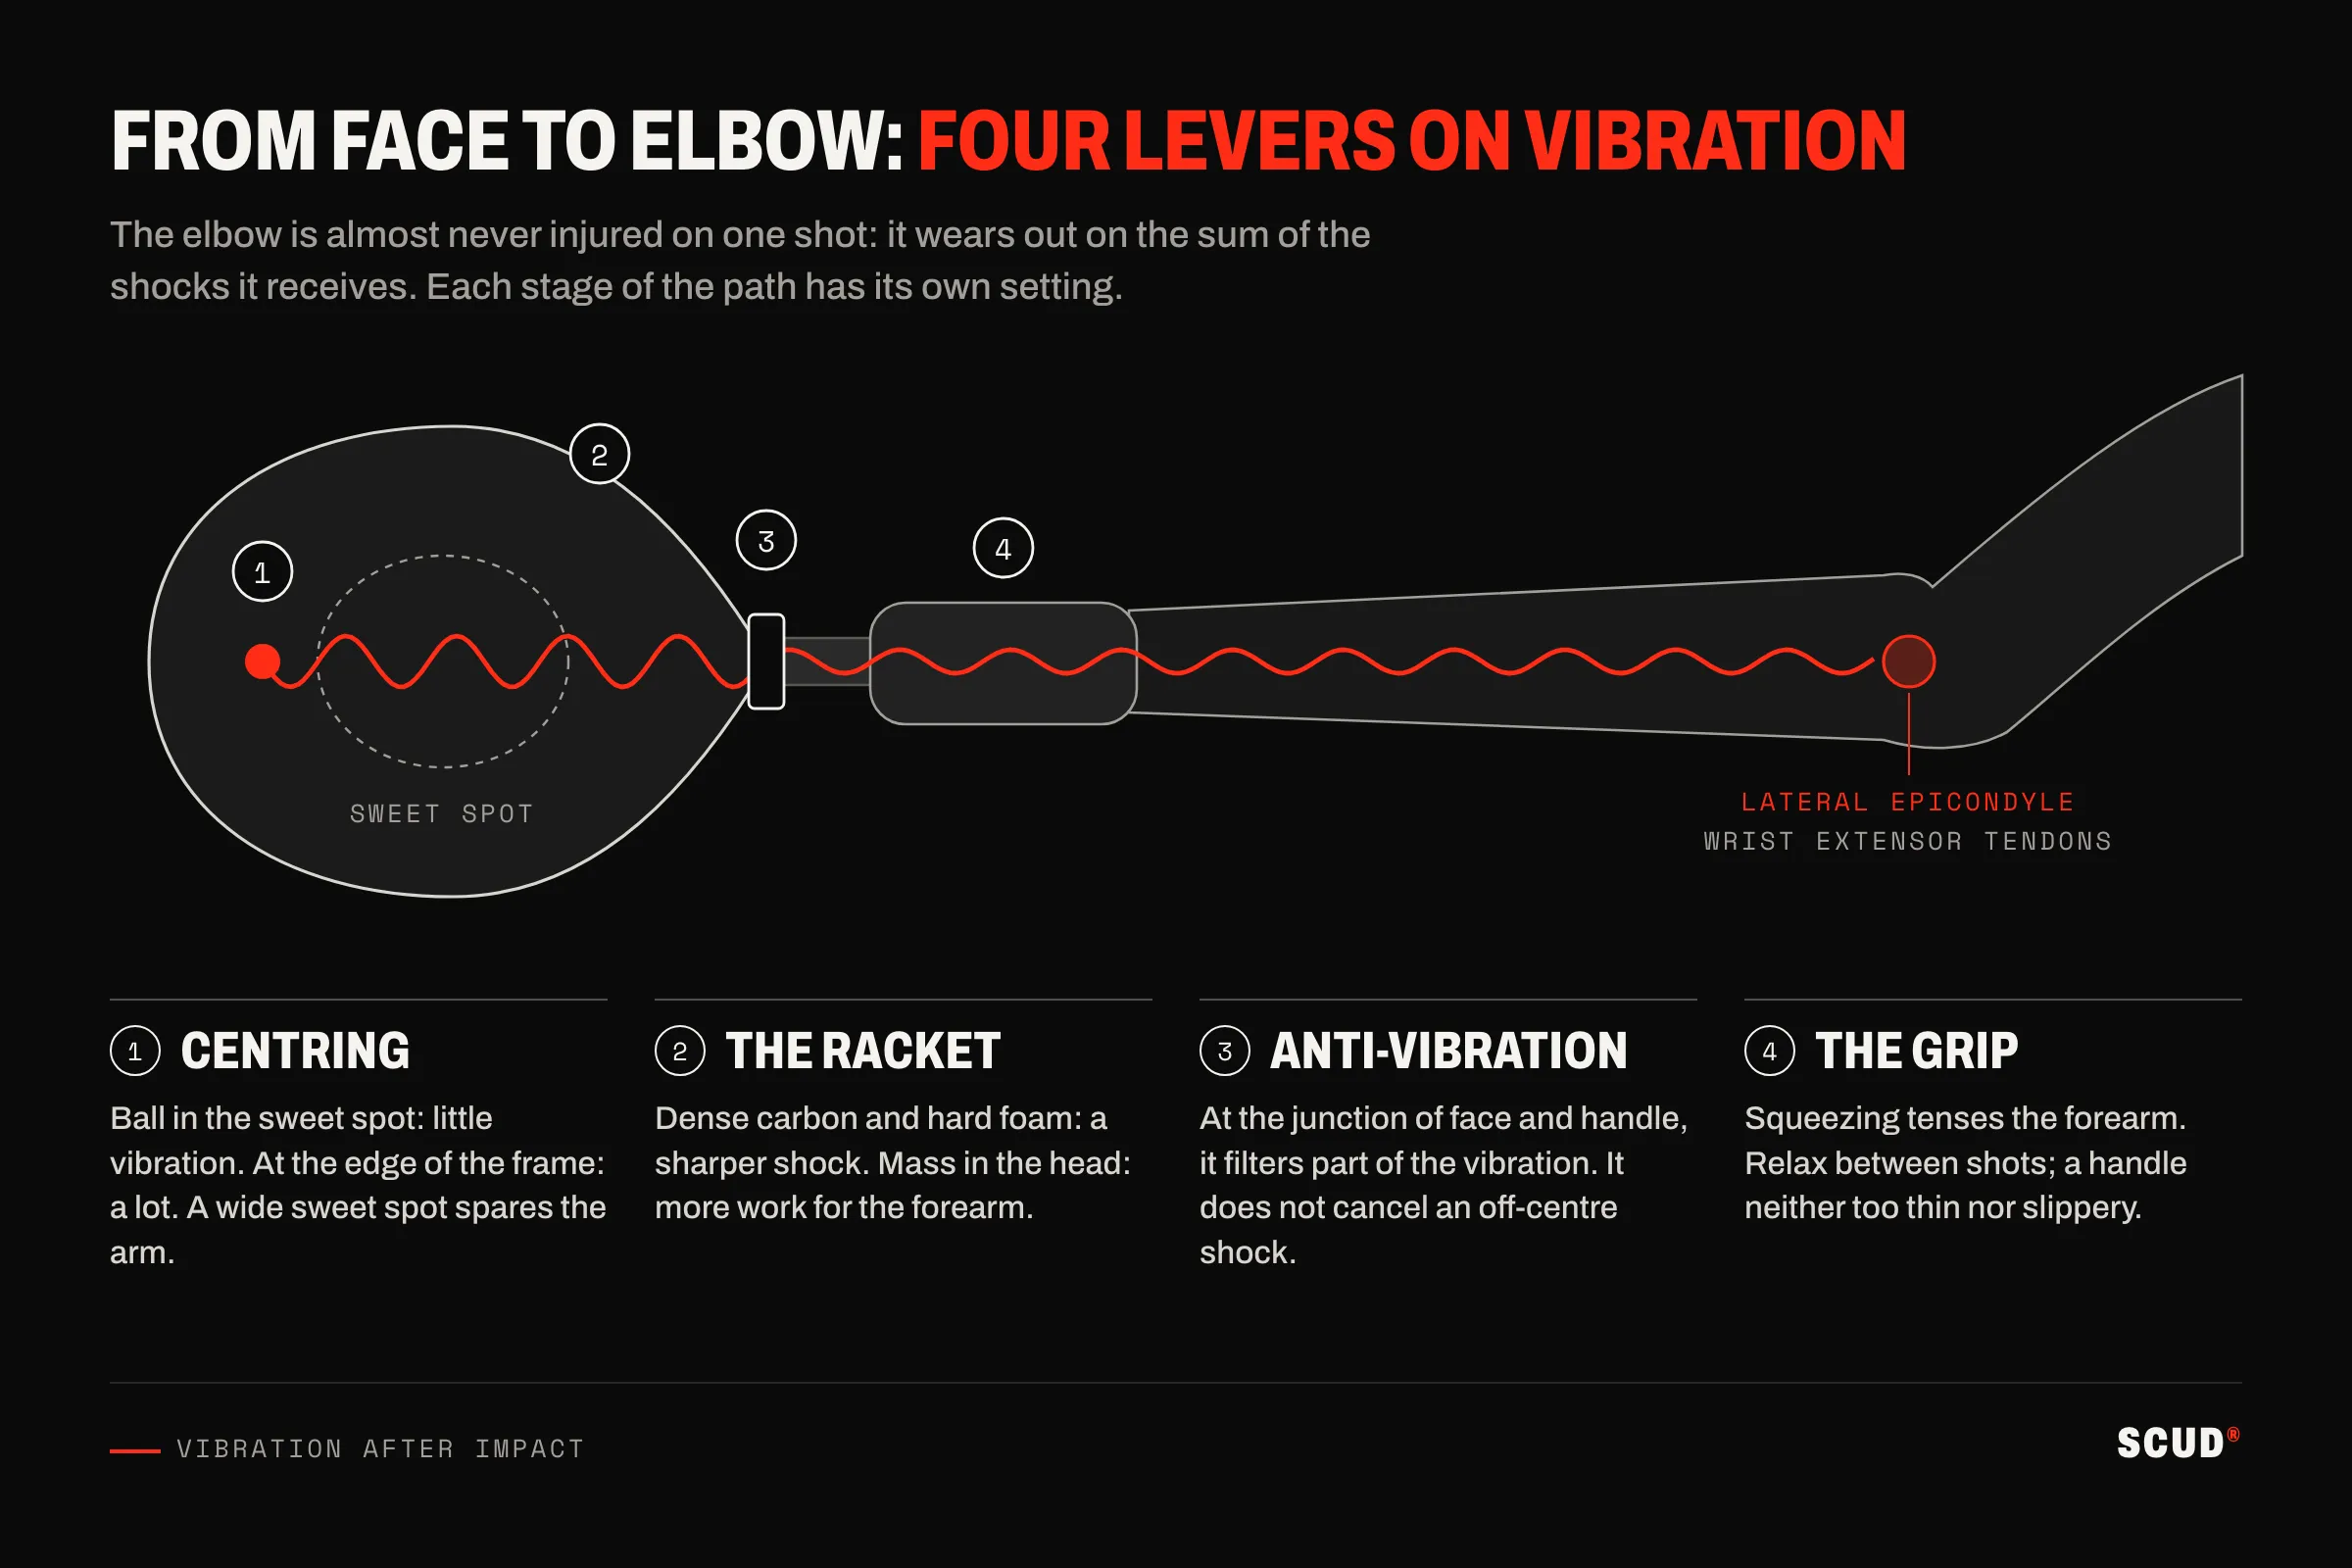
A good grip will not cure established tennis elbow; if the pain persists, see a doctor or physiotherapist. But a relaxed hand, a handle of the right thickness and a dry overgrip are part of prevention. The other equipment-related factors are covered in our article on tennis elbow and the role of the racket.
And where does the racket come in?
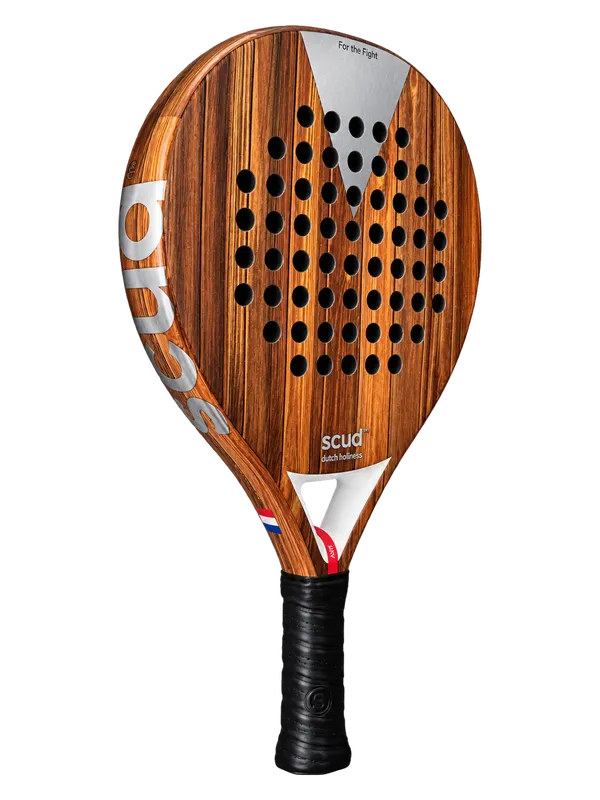
All padel rackets are held the same way, and a correct grip matters more than the model. That said, a manoeuvrable racket and a handle you can hold without squeezing make learning easier. All our rackets have a standard handle size and a honeycomb silicone handle covered with a grip; the SCUD Wood W1, a 350 g teardrop with medium balance, is the most manoeuvrable in the range. The rest of the choice is covered in our guide to the padel racket for beginners.
In short
- The continental grip, or hammer grip, is the reference grip in padel: edge pointing up, hand closed as if around a hammer, base of the index finger on bevel 2.
- It covers the volley, the serve, the bandeja, the smash, the lob and shots off the glass, with no grip change between forehand and backhand.
- The eastern grips are variants for experienced players; the tennis western and semi-western grips close the face and are best avoided.
- Hand at the bottom of the handle, fingers doing the holding, moderate pressure that firms up at impact, wrist strap on before you pick up the racket.
- A handle of the right thickness and a dry overgrip stop you squeezing, which spares the elbow.
Frequently asked questions
What is the right grip for holding a padel racket?
The continental grip, also called the hammer grip. With the frame edge pointing up, close your hand around the handle as if around a hammer, with the base of the index finger on the upper diagonal bevel. It lets you play forehand, backhand, volley, serve and smash without changing grip.
Should you change grip between forehand and backhand in padel?
No, and that is the whole point of the continental grip. The face is almost neutral: a rotation of the forearm is enough to switch sides. Some experienced players adopt an eastern grip for a forehand from the back of the court, when they have time to set up.
Can you play padel with your tennis grip?
Not with a semi-western or western forehand grip: it closes the face, makes volleys and low balls difficult and forces you to change grip for the backhand. Tennis players are better off going back to their service grip, the continental, for every shot.
Where should you place your hand on the handle?
At the bottom of the handle: the bottom of the hand, where the wrist begins, lines up with the butt of the racket, without the fingers sticking out. A grip that is too high reduces reach and unbalances the racket.
Should you grip a padel racket hard?
No. The hand stays firm but relaxed and tightens at the moment of impact. Padel Browser suggests about 5 out of 10 during the rally and 7 out of 10 at impact; there is no official scale. Squeezing all the time tires the forearm and loads the elbow.
Is the wrist strap compulsory?
Yes. The rules of the International Padel Federation require a non-elastic cord of no more than 35 cm, attached to the handle and worn on the wrist during play. Slip your hand through the loop before taking hold of the handle, so it stays in place without squeezing.
The grip is only the first building block: for what comes next, from positioning to special shots, follow our learn padel path.
Sources
- Análisis del uso del grip con fijaciones sobre la efectividad de la volea en pádel
- Techniques padel : maîtriser les coups essentiels pour progresser rapidement
- Maîtriser les techniques de frappe au padel : guide complet pour progresser
- Padel grip guide: how to hold your racket
- An overview and guide to the continental grip
- Grip (tennis)
- Comment corriger les erreurs de la prise continentale au padel
- How to hold a padel racket? Clear explanation
- Padel tips from professional players
- Comment bien tenir une raquette de padel
- Rules of Padel
- Potential effects of racket grip size on lateral epicondilalgy risks